
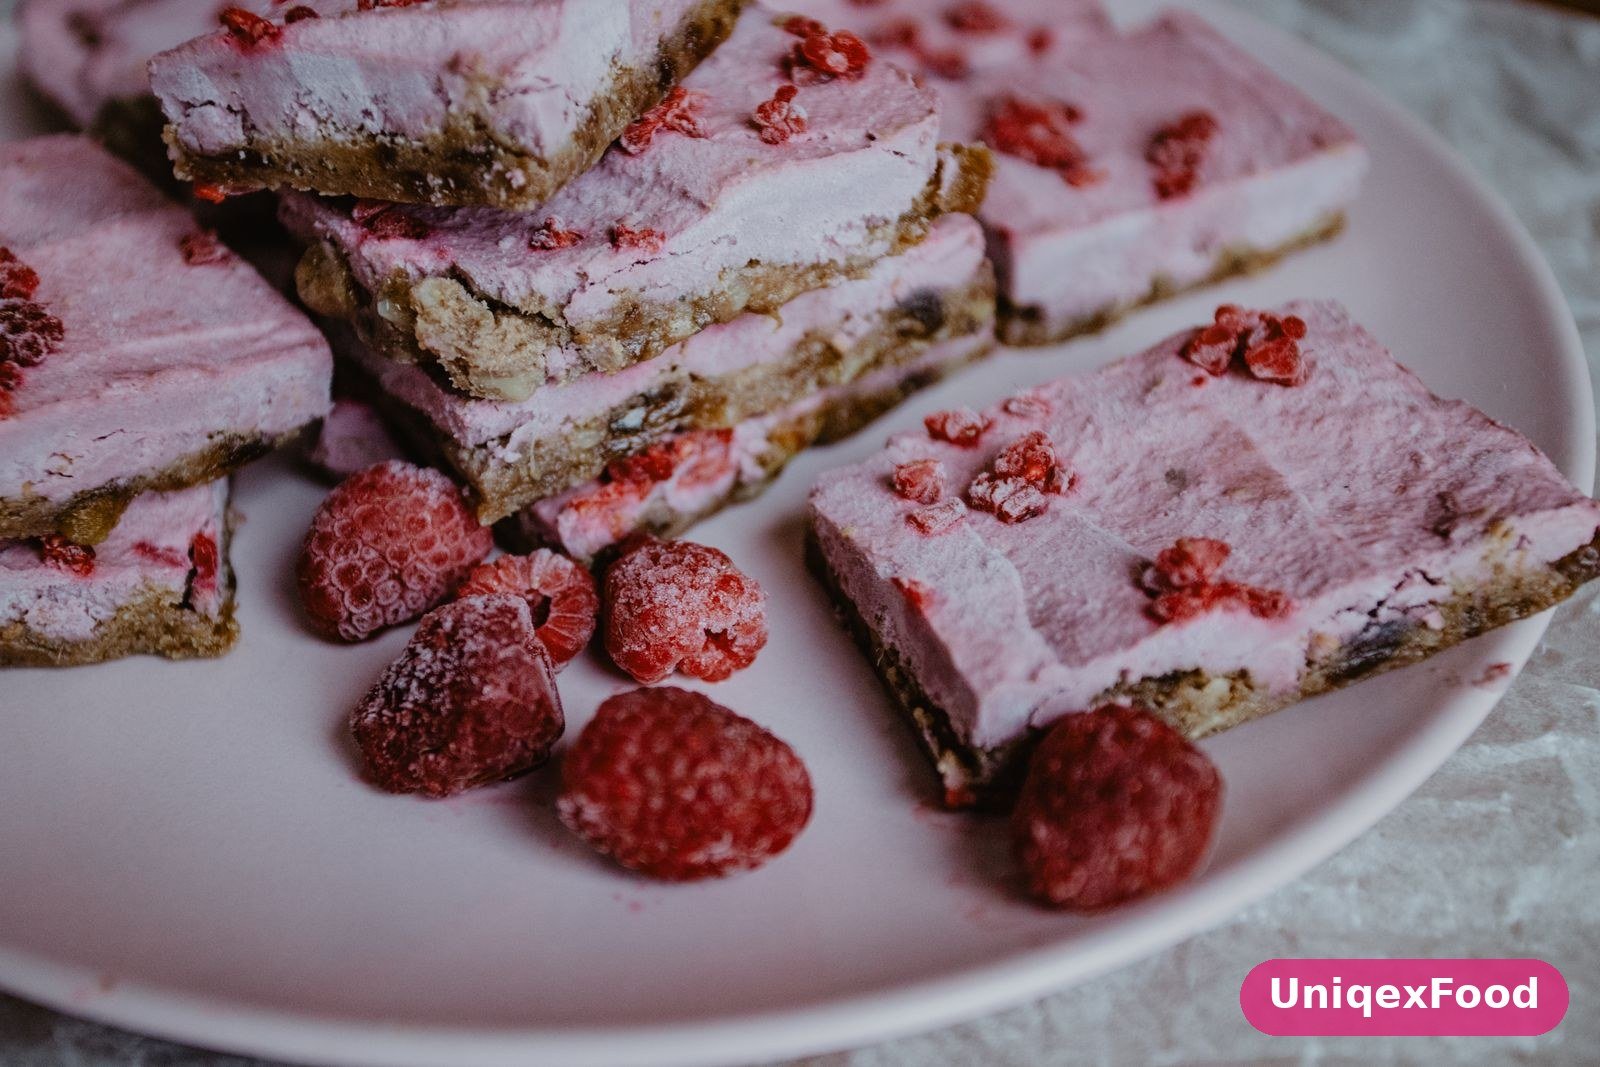
Raspberry Cheesecake Bars
There is a dessert that I make whenever I need something that looks impressive and tastes even better, and it is these raspberry cheesecake bars. They have everything I want in a dessert: a buttery graham cracker crust, a creamy cheesecake filling that is rich without being heavy, and a bright raspberry swirl that cuts through the richness with a little tartness. They slice cleanly into neat squares, they travel well, and they disappear from a dessert table faster than anything else I put next to them. I first made them for a summer gathering, when I wanted cheesecake but did not want to deal with a springform pan, a water bath, and the worry about cracks. Bars solved all of that.
The thing about a full cheesecake is that it is a commitment. It takes hours, it needs special equipment, and it has a way of cracking right down the middle just when you want it to look perfect. Bars are the practical answer to all of that. They bake in an ordinary square pan, they are done in about half an hour, and because they are cut into squares, a small crack in the top — if you even get one — simply does not matter. The raspberry swirl on top makes them look beautiful regardless, and nobody has ever looked at a plate of these bars and wished they were a round cheesecake instead.
The raspberry part is what makes them special. I use a quick homemade raspberry sauce, made by simmering fresh or frozen raspberries with a little sugar and lemon juice until they break down, and then I swirl it through the cheesecake filling with the tip of a knife before baking. The swirl is not just decoration — it is flavor in every bite, a bright, tart ribbon running through the creamy filling. A few drags of a knife through the sauce, and you have a dessert that looks like it came from a patisserie.
These bars are also wonderfully practical. They need a few hours in the fridge to set properly, but that is hands-off time, and they are actually better the next day, once the flavors have settled and the filling has firmed up. That makes them a perfect make-ahead dessert for a party, a holiday, or a weekend when you want something sweet in the fridge without having to bake on the day. They keep well, they freeze well, and they are just as good eaten straight from the fridge with a cup of coffee as they are dressed up on a plate for guests.
Why You’ll Love This Recipe
First, they are far easier than a traditional cheesecake. There is no springform pan, no water bath, no worrying about cracks, and no overnight chilling. You press the crust into a square pan, pour in the filling, swirl in the raspberry sauce, and bake for about thirty minutes. That is the whole recipe, and it is the kind of baking that even a nervous baker can do with confidence. I have made these with my niece, who was twelve at the time and had never baked anything more complicated than cookies, and she did most of it herself. If she can do it, you can do it.
Second, the flavor is exactly right. The crust is buttery and a little salty, the filling is creamy and lightly sweet with a hint of vanilla and lemon, and the raspberry swirl is bright and tart. None of the parts overwhelms the others, and every bite has a little bit of everything. It is rich, but the raspberries keep it from feeling heavy, which is why people always eat two.
Third, they are beautiful without any decorating skill. The raspberry swirl does all the visual work for you — a few strokes of a knife and you have a marbled top that looks like you spent hours on it. Add a few fresh raspberries on top when you serve them, and they look like they belong in a bakery window.
Finally, they are practical in a way that most desserts are not. They slice into sixteen neat squares, they stack well in a container, they travel well to a party, and they keep in the fridge for days and in the freezer for months. You can make them on a Friday and serve them on a Sunday, and nobody will know the difference. If you like desserts that are easy to share, my red velvet cake with cream cheese frosting is another crowd-pleaser that uses a similar cream cheese richness, and it is the cake I make when I need to feed a lot of people.
Ingredients You’ll Need
- For the crust: 1 1/2 cups (180g) graham cracker crumbs
- For the crust: 1/4 cup (50g) granulated sugar
- For the crust: 6 tablespoons (85g) unsalted butter, melted
- For the crust: a pinch of salt
- For the raspberry sauce: 1 1/2 cups (200g) fresh or frozen raspberries
- For the raspberry sauce: 2 tablespoons granulated sugar
- For the raspberry sauce: 1 teaspoon lemon juice
- For the raspberry sauce: 1 teaspoon cornstarch mixed with 1 tablespoon cold water
- For the filling: 16 ounces (450g) full-fat cream cheese, at room temperature
- For the filling: 2/3 cup (135g) granulated sugar
- For the filling: 2 large eggs, at room temperature
- For the filling: 1/3 cup (80g) sour cream
- For the filling: 1 teaspoon vanilla extract
- For the filling: 1 teaspoon lemon zest
- For the filling: 1 tablespoon lemon juice
- Fresh raspberries, for serving (optional)
How to Make Raspberry Cheesecake Bars
Start by making the raspberry sauce, because it needs time to cool before it goes onto the cheesecake. Put the raspberries, sugar, and lemon juice in a small saucepan over medium heat, and cook them for four to five minutes, stirring and mashing gently with a spoon, until the berries have broken down into a thick, jammy sauce. Stir in the cornstarch mixture and cook for another minute, until the sauce thickens enough to coat the back of a spoon. Then pour it through a fine-mesh sieve into a bowl, pressing the pulp with the back of a spoon to push the smooth sauce through and leave the seeds behind. You should have about half a cup of smooth, glossy raspberry sauce. Set it aside to cool while you make the crust and the filling, and taste it — it should be bright and tart with just enough sweetness. If it tastes too sharp, stir in another teaspoon of sugar while it is still warm.
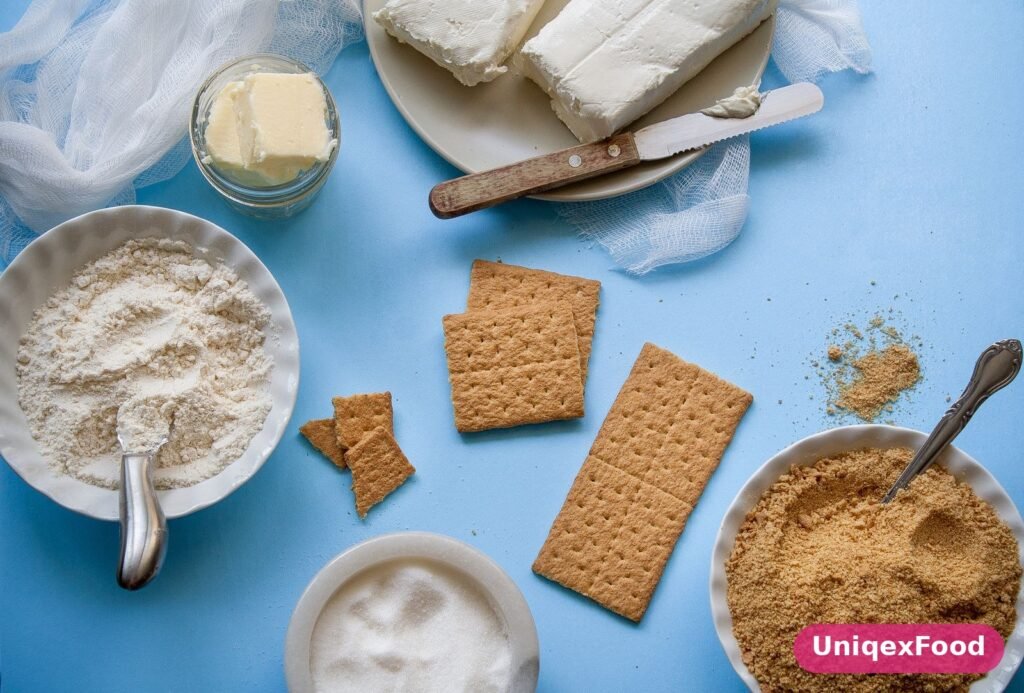
Heat the oven to 325°F (165°C) and line a 9-by-9-inch square baking pan with parchment paper, leaving overhang on two sides so you can lift the bars out later. This parchment sling is not optional in my opinion — it is the difference between neat squares and a pan you have to dig bars out of with a spoon. In a medium bowl, stir together the graham cracker crumbs, sugar, melted butter, and salt until the mixture looks like wet sand and holds together when you squeeze a handful. Tip it into the prepared pan and press it down firmly and evenly with the bottom of a measuring cup or a flat glass. Press it into the corners and make sure the layer is even — an uneven crust means some bars will have a thick, hard base and others will have almost none. Bake the crust for eight minutes, just until it smells toasty and looks set, then take it out and let it cool for a few minutes while you make the filling. Leave the oven on.
Now make the cheesecake filling, and the most important thing here is that the cream cheese is genuinely at room temperature. Cold cream cheese does not beat smooth, and it leaves lumps in the filling that no amount of beating will fix. Take it out of the fridge at least an hour before you start, or cut it into cubes and leave it on the counter for thirty minutes. Beat the cream cheese in a large bowl with an electric mixer on medium speed for about a minute, until it is smooth and creamy, then add the sugar and beat for another minute until it is fully combined. Add the eggs one at a time, beating on low speed just until each one disappears into the batter. Then add the sour cream, vanilla, lemon zest, and lemon juice, and beat on low just until everything is smooth. Do not overbeat the filling — too much air in the batter is what causes cheesecake to puff up in the oven and then crack as it cools. The filling should be smooth, thick, and pourable, and it should not have any visible lumps.
Pour the filling over the baked crust and smooth the top with a spatula. Then take the cooled raspberry sauce and drop spoonfuls of it over the surface, about eight or ten dollops scattered across the top. Take a knife or a skewer and drag it through the dollops in long, looping strokes, swirling the sauce into the filling. Do not overdo it — five or six strokes is enough, and you want distinct ribbons of raspberry, not a uniformly pink filling. The swirl should look a little wild and marbled, not neat and careful. If you want more ideas for this kind of swirled dessert, the BBC Good Food cheesecake recipes collection has plenty of variations, from baked to no-bake, and it is a good place to browse when you want a second cheesecake in a different flavor.
Put the pan in the oven and bake for twenty-eight to thirty-two minutes, until the edges are set and the center still has a slight wobble when you gently shake the pan. That wobble is correct — it is not underbaked, it is cheesecake, and it will firm up as it cools. If the center is completely firm in the oven, the bars will be overbaked and dry. Take the pan out and let it cool on the counter for an hour, then cover it loosely and put it in the fridge for at least four hours, or overnight if you can. The chilling is not optional — it is what sets the filling and lets you cut clean squares. Once it is fully chilled, lift the slab out of the pan using the parchment overhang, and cut it into sixteen squares with a sharp knife, wiping the blade clean between cuts for the neatest edges. Serve cold, with a few fresh raspberries on top if you like.
Tips for Perfect Cheesecake Bars
The first tip is the one that matters most: use room-temperature cream cheese, room-temperature eggs, and room-temperature sour cream. Cold ingredients do not blend smoothly, and lumpy cheesecake filling is the most common complaint I hear about homemade cheesecake. It is a small bit of planning that makes a large difference in the final texture, and it is worth building into your routine.
The second tip is to not overbeat the filling. Beat the cream cheese and sugar until smooth, then add the eggs and the rest of the ingredients on low speed, mixing just until they disappear. Overbeating whips air into the batter, and air expands in the oven and then collapses as the bars cool, which is one of the main causes of cracks and sinking. You want the filling to be smooth and combined, not fluffy. If you are using a stand mixer, keep it on low once the eggs go in, and scrape down the sides of the bowl once or twice to make sure there are no pockets of unmixed cream cheese hiding at the bottom.
The third tip is about the bake itself. Low and slow is the rule for cheesecake — 325°F is hot enough to set the filling without overcooking it, and the bars should come out of the oven while the center still wobbles slightly. That wobble scares people the first time, but it is exactly right, and the residual heat plus the chilling time will finish the job. If you bake the bars until the center is firm, they will be dry and dense. Trust the wobble. And do not open the oven door to check them every five minutes — the rush of cool air can cause the surface to crack. Set a timer for twenty-eight minutes, check once, and then give them another few minutes only if the edges are not set.
Finally, chill the bars properly before you cut them. Four hours in the fridge is the minimum, and overnight is even better. Warm or even slightly cool cheesecake is soft and will not cut cleanly, and you will end up with smeared squares instead of neat ones. Use the parchment sling to lift the whole slab out of the pan, and cut with a long, sharp knife, wiping the blade clean with a damp cloth between cuts. Run the knife under hot water and dry it if you want truly perfect edges — it is a little fussy, but it is the difference between bars that look homemade in the best way and bars that look like they were cut in a hurry. If you enjoy this kind of forgiving, small-batch baking, my small-batch cookies without baking soda are another easy recipe that comes together in one bowl.
Variations to Try
For a chocolate raspberry version, add a layer of melted chocolate between the crust and the filling. Melt four ounces of dark chocolate with a tablespoon of butter, spread it over the baked and cooled crust, and let it set for ten minutes in the fridge before you pour in the filling. The chocolate adds a rich, dark note that pairs beautifully with the raspberries, and it makes the bars taste like a chocolate raspberry truffle in bar form. It is the version I make for Valentine’s Day, and it is always the first dessert to disappear.
For a lemon raspberry version, add the zest of a whole lemon and an extra tablespoon of lemon juice to the filling, and swap the raspberry sauce for a lemon curd swirl. The result is brighter and tangier, and it tastes like summer. You can also make the sauce with a mix of raspberries and blackberries, which gives a deeper, more complex berry flavor, or with strawberries, which make a sweeter, softer swirl. Frozen mixed berries work well here too — just simmer them the same way and strain them, and you will have a beautiful deep-purple sauce.
You can also change the crust. Chocolate graham crackers make a wonderful base, especially with the chocolate raspberry variation, and crushed vanilla wafers or digestive biscuits work just as well as graham crackers if that is what you have. For a nutty crust, replace a quarter cup of the crumbs with finely ground almonds or pecans — it adds a toasty flavor that is lovely with the raspberries. And if you want a gluten-free version, use gluten-free graham crackers or a gluten-free cookie crumb, and the rest of the recipe stays exactly the same. If you love baking with chocolate chips in general, my chocolate chip cookies without brown sugar are another easy recipe worth trying, and they use the same pantry staples.
Serving Ideas

The simplest way to serve these bars is cold from the fridge, cut into neat squares, with a few fresh raspberries on top. They do not need anything else — the swirl is the decoration, the flavor is the point, and a cold cheesecake bar with a cup of coffee is one of the great small pleasures.
For a party or a dessert table, arrange the bars on a platter with a dusting of powdered sugar and a scattering of fresh berries and mint leaves. They look beautiful next to other desserts, and because they are cut into squares, people can take one without committing to a whole slice of cake, which means they disappear faster than anything else on the table. I have served them at birthday parties, baby showers, and holiday dinners, and they are always the dessert people ask about. If you are building a dessert table and want another classic alongside them, the BBC Good Food carrot cake recipe is a wonderful companion, and it is the kind of cake that suits the same occasions.
For a more dressed-up presentation, serve a bar on a small plate with a spoonful of whipped cream and a drizzle of the leftover raspberry sauce, or with a scoop of vanilla ice cream. The warm-cold contrast of ice cream against a cold cheesecake bar is lovely, and the extra sauce makes the plate look like it came from a restaurant. A few chocolate shavings on top would not hurt either. And if you are packing these for a picnic or a lunchbox, wrap each square individually in parchment or cling film — they hold their shape well, they do not need to be kept warm, and they are a very good surprise at the bottom of a picnic basket. For a dessert box, pair the bars with my small-batch chocolate chip cookies without a mixer, which travel just as well.
Storage and Reheating
These bars keep in the fridge for four to five days in an airtight container, and they actually taste better on the second day, once the flavors have had time to settle and the filling has firmed up completely. Store them in a single layer if you can, or separate layers with parchment paper so the tops do not stick together. Keep them covered — cheesecake absorbs odors from the fridge easily, and you do not want your raspberry bars tasting like last night’s onions. They are best eaten cold, straight from the fridge, and they do not need reheating at all.
If you want to keep them longer, they freeze beautifully. Cut them into squares first, then wrap each square individually in cling film and put them in a freezer bag or a sealed container. They will keep for up to three months. To thaw, move a square to the fridge overnight, or leave it on the counter for an hour. Do not thaw them in the microwave — it will melt the filling and ruin the texture. A frozen bar, thawed slowly in the fridge, tastes almost exactly like a fresh one, and it is a wonderful thing to have on hand for unexpected guests.
Do not leave these bars at room temperature for more than two hours. The filling is made with cream cheese and eggs, and like any dairy-based dessert, it should be kept cold. If you are serving them at a party, put out half the batch and keep the rest in the fridge, refilling the plate as needed. It is a small bit of planning that keeps the dessert safe and tasting its best, and it is the kind of detail that matters when you are feeding other people.
Frequently Asked Questions
Can I use frozen raspberries for the sauce?
Yes, and I do for most of the year, because fresh raspberries are expensive out of season and frozen ones are picked at their best. Use them straight from the freezer — there is no need to thaw them first. Just simmer them with the sugar and lemon juice the same way you would fresh berries, and give them an extra minute or two to break down, since they start out cold. The straining step is the same either way, and it is what gives you a smooth, seedless sauce.
Why did my cheesecake bars crack?
Cracks usually come from one of three things: overbeating the filling, overbaking, or cooling too quickly. Overbeating whips air into the batter, and that air expands in the oven and then collapses as the bars cool, pulling the surface apart. Overbaking dries out the filling and makes it contract. And a sudden change in temperature — like taking the bars straight from a hot oven into a cold fridge — can shock the surface into cracking. To prevent it, beat the filling on low speed once the eggs go in, take the bars out while the center still wobbles, and let them cool on the counter for an hour before you put them in the fridge. And if they do crack, remember that the raspberry swirl covers a multitude of sins, and once they are cut into squares, nobody will ever know.
Can I make these bars ahead of time?
Yes, and they are actually better when you do. Make them the day before you need them, chill them overnight in the fridge, and cut them into squares the next day. The overnight chill gives the filling time to set completely and the flavors time to settle, and the bars will be firmer, cleaner, and better-tasting than ones cut after only four hours. They keep in the fridge for four to five days, so you can make them up to two days ahead without any loss of quality. If you need them further ahead than that, freeze them — they keep for three months in the freezer, and a slow thaw in the fridge brings them back to perfect.
Do I need a springform pan?
No, and that is one of the best things about this recipe. A regular 9-by-9-inch square baking pan is all you need, and it is the pan most people already have in their kitchen. The parchment sling — a sheet of parchment with overhang on two sides — is what makes it work, because it lets you lift the whole slab out of the pan in one piece and cut it on a board. A springform pan is wonderful for round cheesecakes, but it is unnecessary here, and honestly it is more trouble than it is worth for bars. If you only have an 8-by-8-inch pan, you can use that instead — the bars will be a little thicker and may need three or four extra minutes in the oven.
Can I make these bars gluten-free?
Yes, easily. The only ingredient that contains gluten is the graham cracker crust, and you can replace the graham crackers with gluten-free graham crackers or any gluten-free cookie crumb in exactly the same amount. The filling and the raspberry sauce are naturally gluten-free, so nothing else needs to change. Just check the labels on your graham crackers and your cornstarch to make sure they are certified gluten-free, since some brands process them in facilities that handle wheat. The texture of the crust will be very slightly different depending on the cookie you use, but it will still be buttery, firm, and delicious.
How do I get clean, neat slices?
Three things make the difference. First, chill the bars fully — at least four hours, and overnight is better — because a warm or soft filling will smear instead of cutting cleanly. Second, use a long, sharp knife, and wipe the blade clean with a damp cloth between every cut, so the filling from one cut does not drag into the next. Third, run the knife under hot water and dry it before each cut if you want truly perfect edges — the warm blade slides through the cold filling cleanly and leaves a smooth, neat face on each square. Cut the slab into four strips one way and four strips the other way to get sixteen even squares, and lift each one out with a small offset spatula or a butter knife so the corners stay sharp.


2 Comments